Configure CTI for SalesForce
Notes
- Setup view: Instructions are based on SalesForce Lightning Experience, not on SalesForce Classic.
- Language: instructions are based on an English SalesForce user interface.
This guide will walk you through the process of deploying the AnywhereNow WebAgent in Salesforce Lightning using Open CTI
License and Privilege Preparation
-
Any Agent using Salesforce CTI should have a named license based on the agent's username (Teams address) purchased from AnywhereNow. The required license name is:
-
INFCTI: Infinity WebAgent Add: CRM Embedded
-
-
The Agent for which the license is purchased has to get the Privileges granted by the administrator in the AnywhereNow Admin portal. See Users privileges. The addidional Privilege name is:
-
CTI SalesForce Agent
-
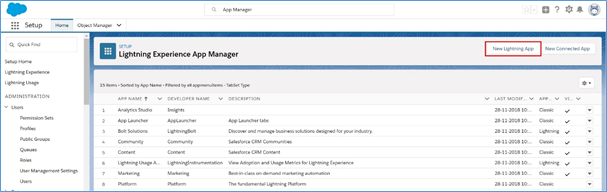
Add a Lightning app
-
In the SalesForce Setup go to App Manager.
Under PLATFORM TOOLS: Apps > App Manager.
Or simply enter ‘App Manager’ in the search field on top. -
Click the ‘New Lightning App’ button.
-
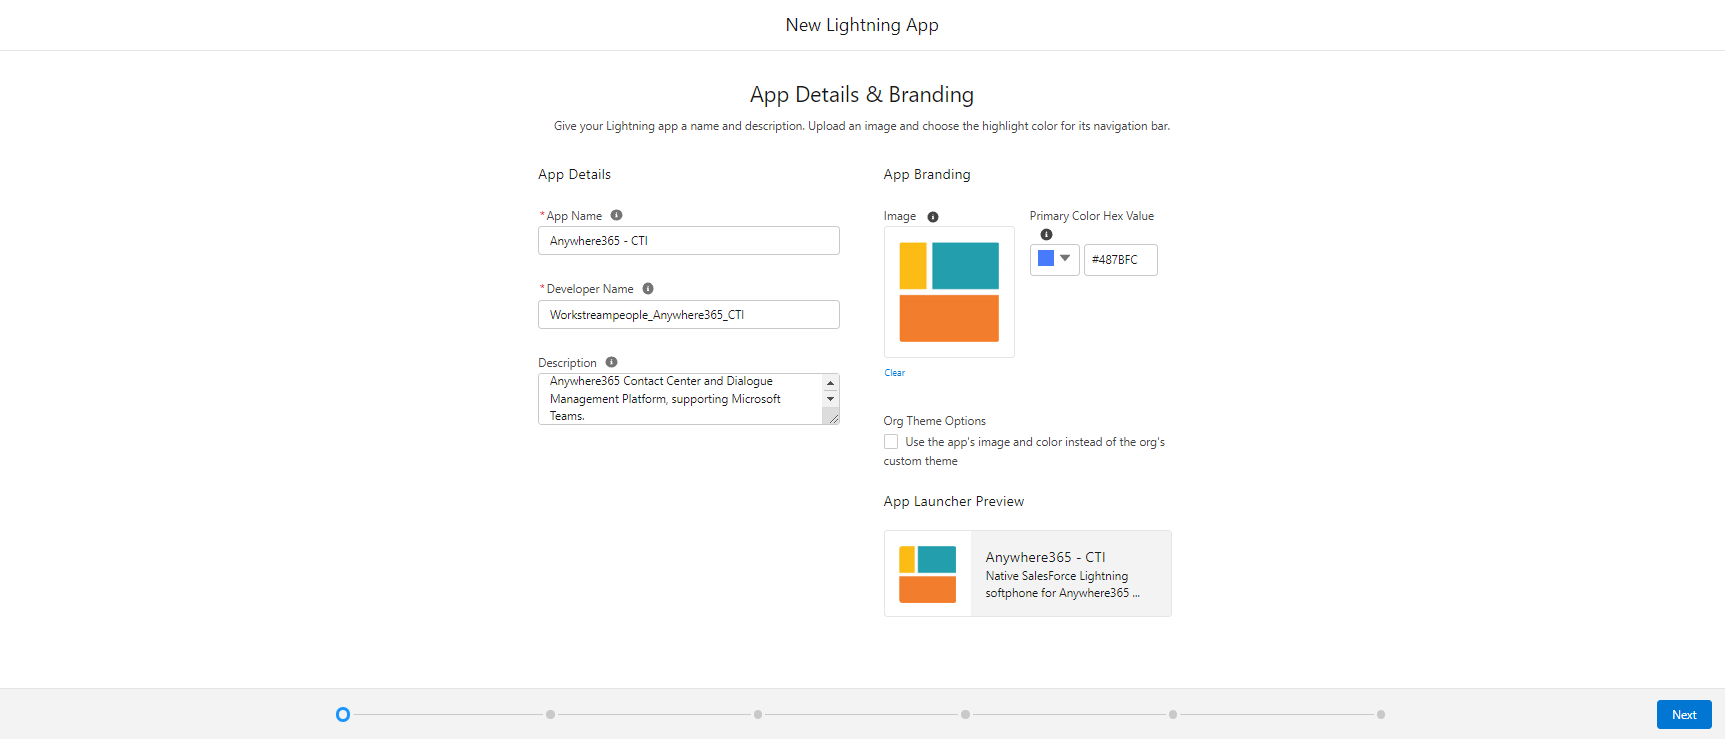
Add App Details & Branding:
- App Name: AnywhereNow - CTI
- Developer Name: Workstreampeople_Anywhere365_CTI
- Description: Native SalesForce Lightning softphone for AnywhereNow Contact Center and Dialogue Management Platform, supporting Microsoft Teams.
- Image: A365_Icon.png

- Color Hex Value: #487BFC
-
Click the ‘Next’ button.
-
App Options
Under ‘Navigation Style’ choose ‘Console navigation’.
Leave the rest unchanged.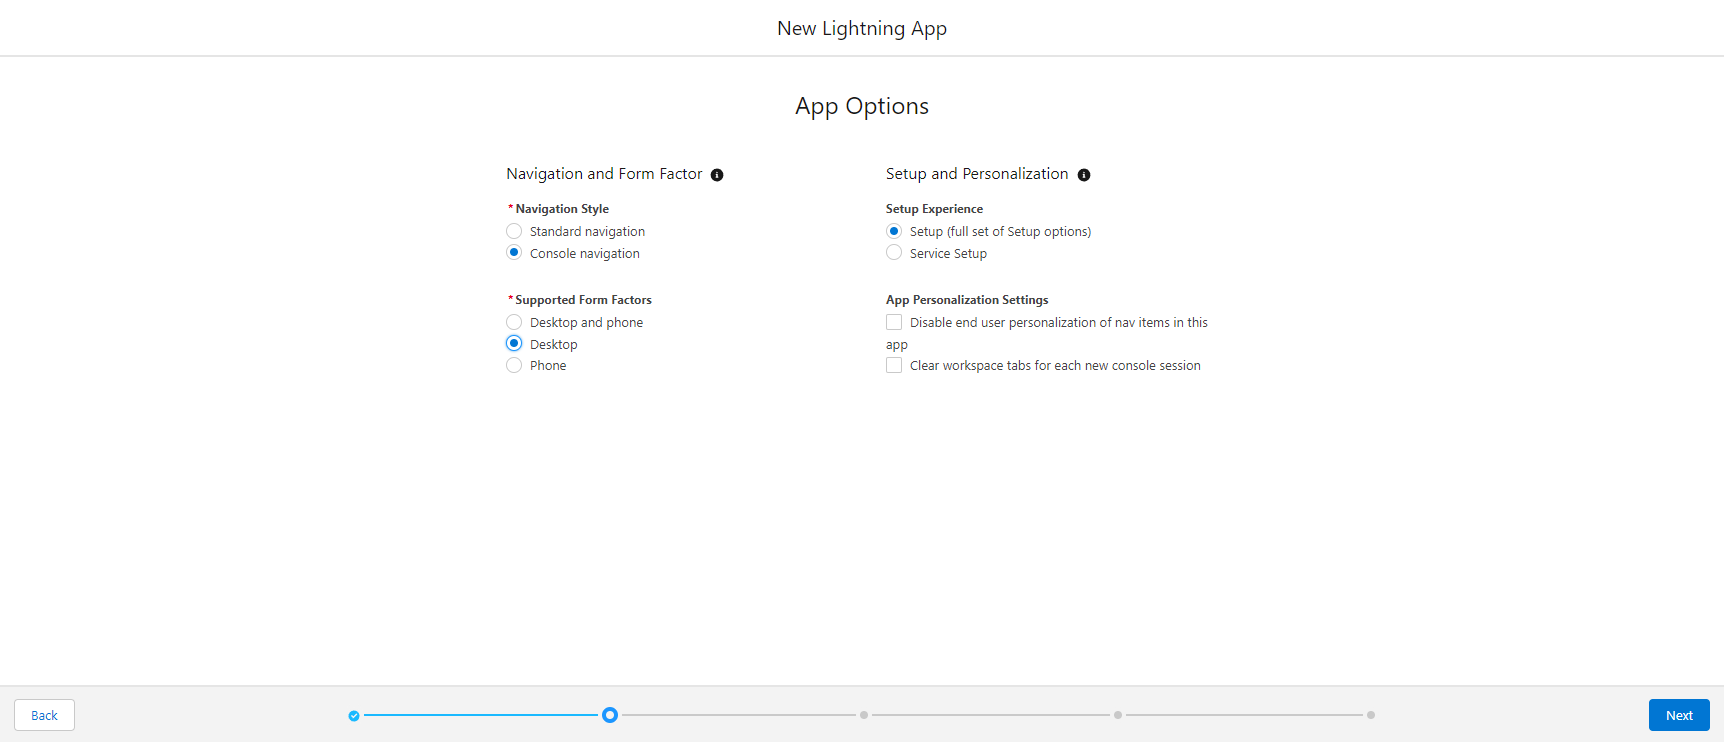
-
Click the ‘Next’ button.
-
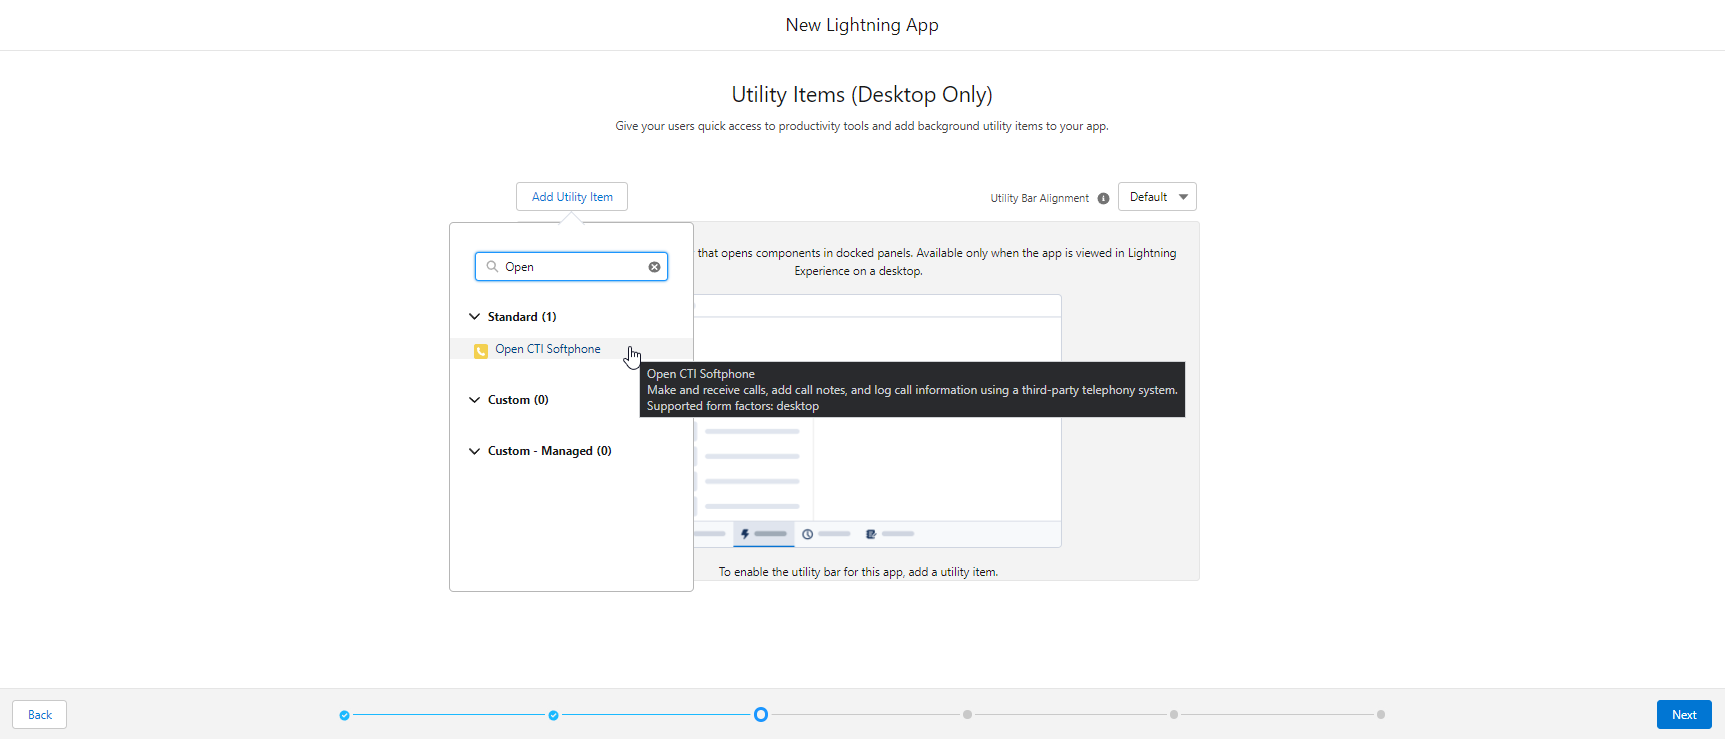
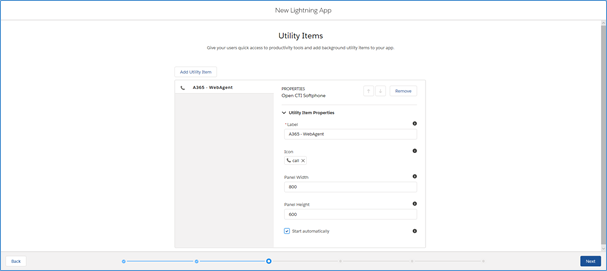
Utility Items:
- Click the ‘Add Utility Item’ button.
- Click ‘Open CTI Softphone’ in the ‘Standard’ list.
- A new properties form will show up.
-
Utility Properties - Open CTI Softphone:
- Label: A365 - WebAgent
- Icon: call
- Width: 800
- Height: 600
- Start automatically: yes
-
Click the ‘Next’ button.
-
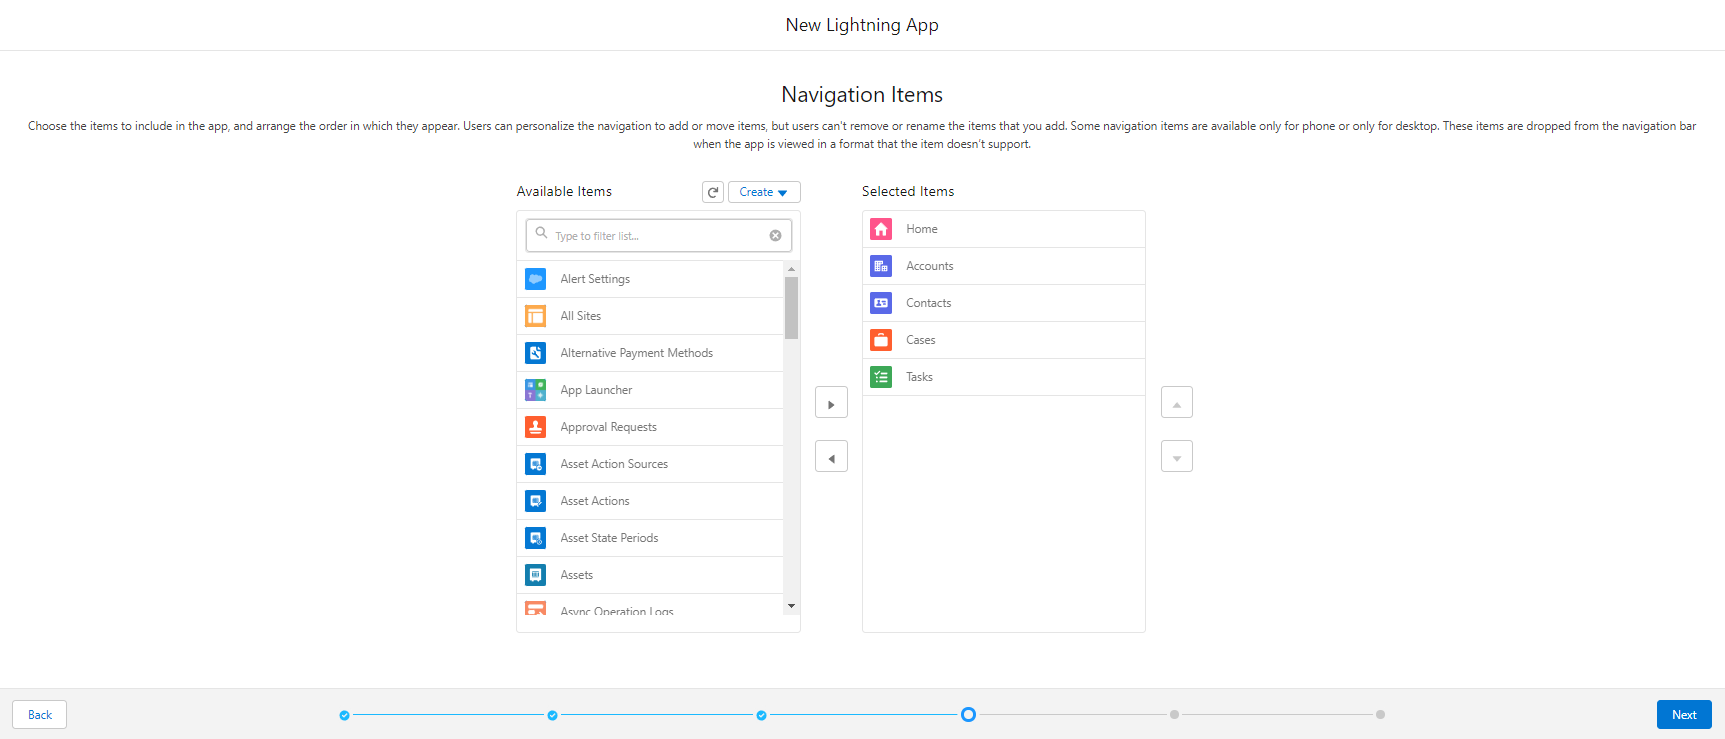
Navigation Items
Add Navigation items according to your likings. Recommended items are:- Home
- Accounts
- Contacts
- Cases
- Tasks
-
Click the ‘Next’ button.
-
Navigation Rules
You can choose how related records will open in addition to primary records. Recommended is to select “Workspace tabs”.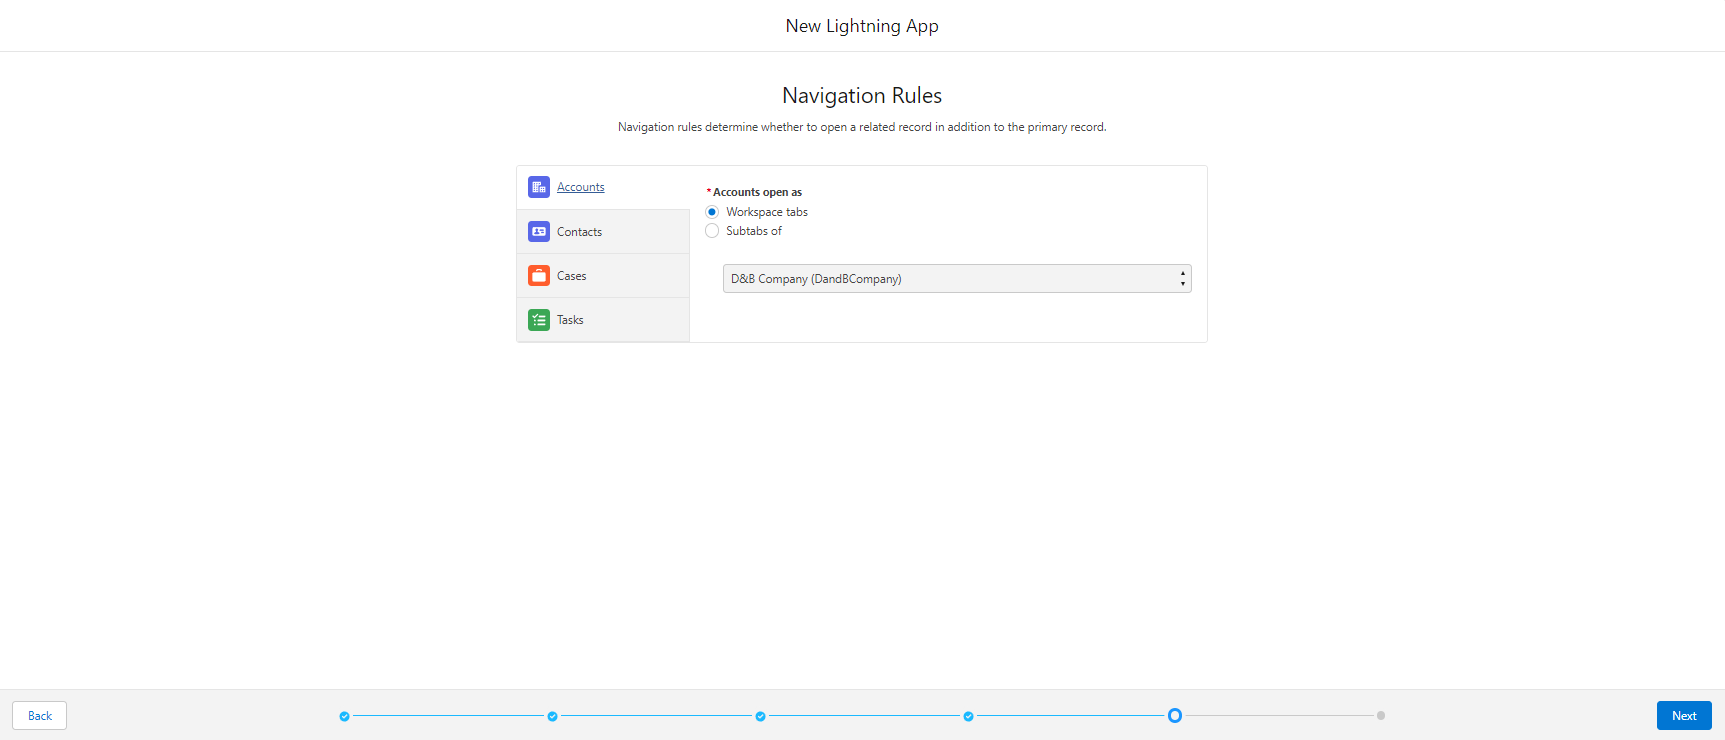
-
Click the ‘Next’ button.
-
User Profiles
Select the user profiles that should be able to access the AnywhereNow - WebAgent.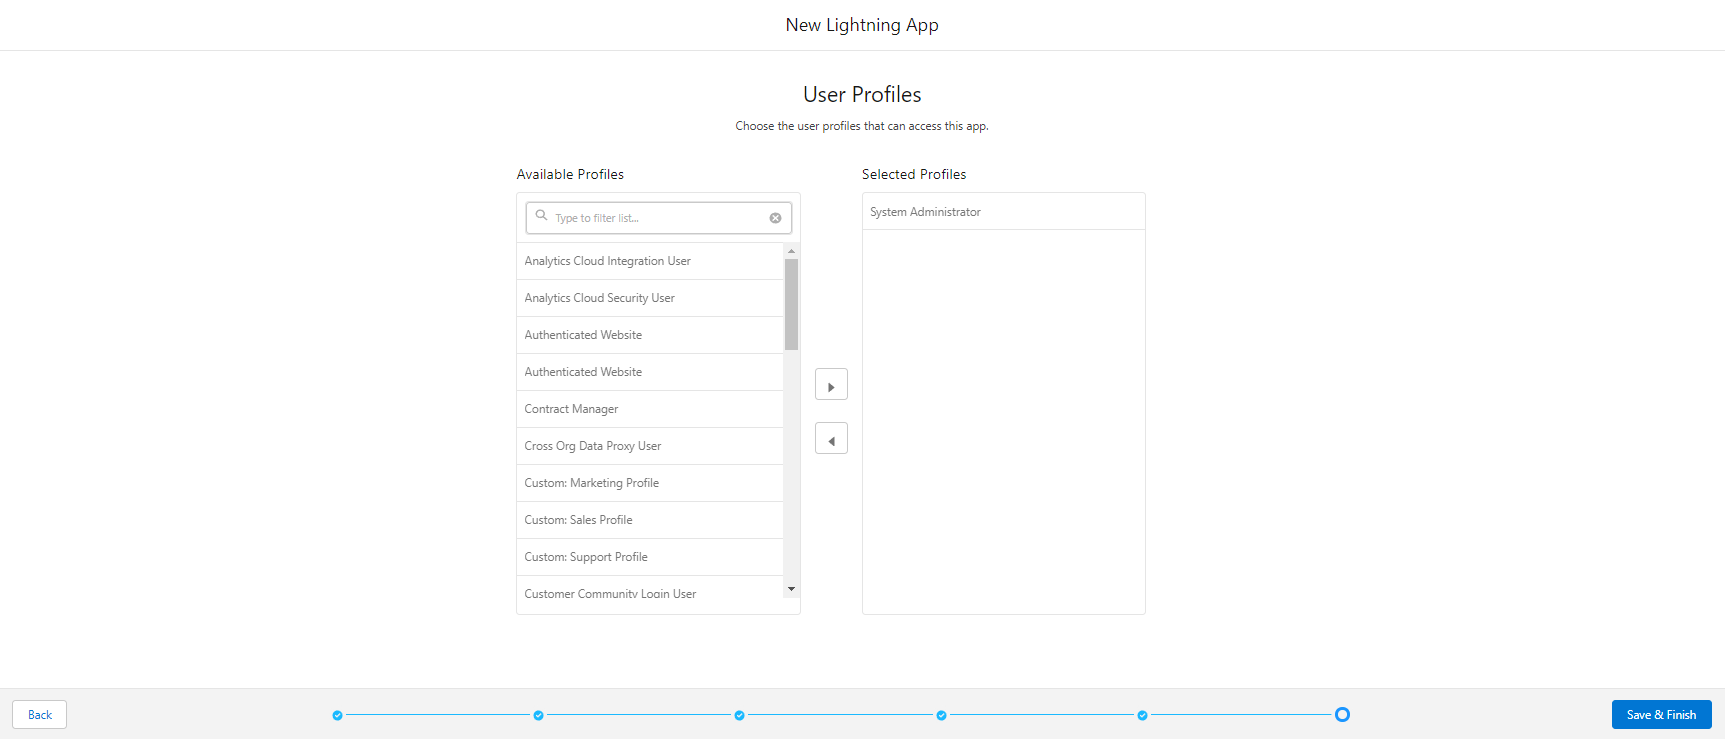
-
Click the ‘Save & Finish’ button.
-
The newly added app will be visible in the App Manager list.

Add a Call Center
-
In the SalesForce Setup menu go to Call Centers.
Under PLATFORM TOOLS: Feature Settings > Service > Call Center > Call Centers.
Or simply enter ‘Call Centers’ in the search field on top. -
When you open the Call Centers Setup for the first time, a ‘Get Started’ page might show up. Click the ‘Continue’ button and make sure the ‘Don’t show me this page again’ checkbox is checked if you don’t want this page to show up the next time.
-
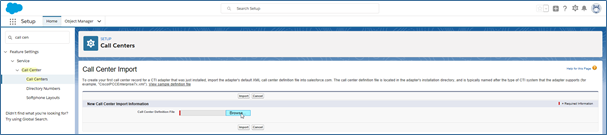
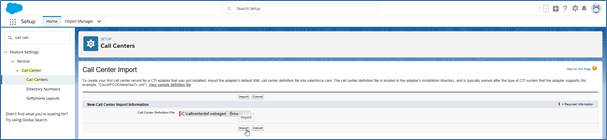
Click the ‘Import’ button.

-
Browse to and select the supplied call center .xml file.
-
Click the ’Import’ button. The AnywhereNow WebAgent call center should be visible in the list now.
Add Call Center users
-
In the SalesForce Setup menu go to Users.
Under ADMINISTRATION: Users > Users.
Or simply enter ‘Users’ in the search field on top. -
Add a new user by clicking ‘New User’ or edit an existing user by clicking the ‘Edit’ link in front of the user.

-
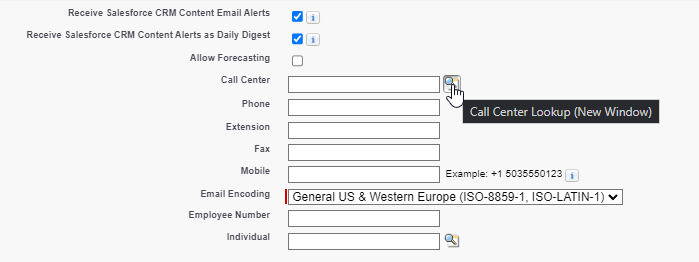
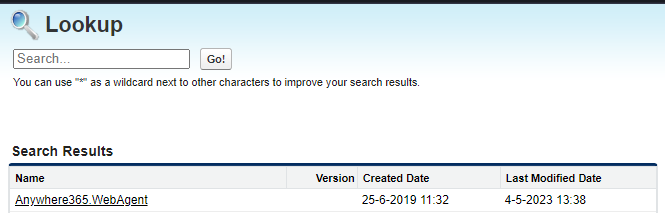
Click on the lookup button (magnifier icon) next to the Call Center field.
-
Select the ‘AnywhereNow.WebAgent’ call center.
-
Save the user profile.
Modify Softphone Layouts
-
In the Salesforce Setup menu go to Softphone Layouts.
Under PLATFORM TOOLS > Feature Settings > Service > Call Center > Softphone Layouts.
Or simply enter ‘Softphone Layouts’ in the search field on top. -
Modify the ‘Standard Softphone Layout’ by clicking ‘Edit’ or create a new softphone layout by clicking ‘New’.
-
Mark the softphone layout as ‘Is Default Layout’
-
Select call type ‘Inbound’
-
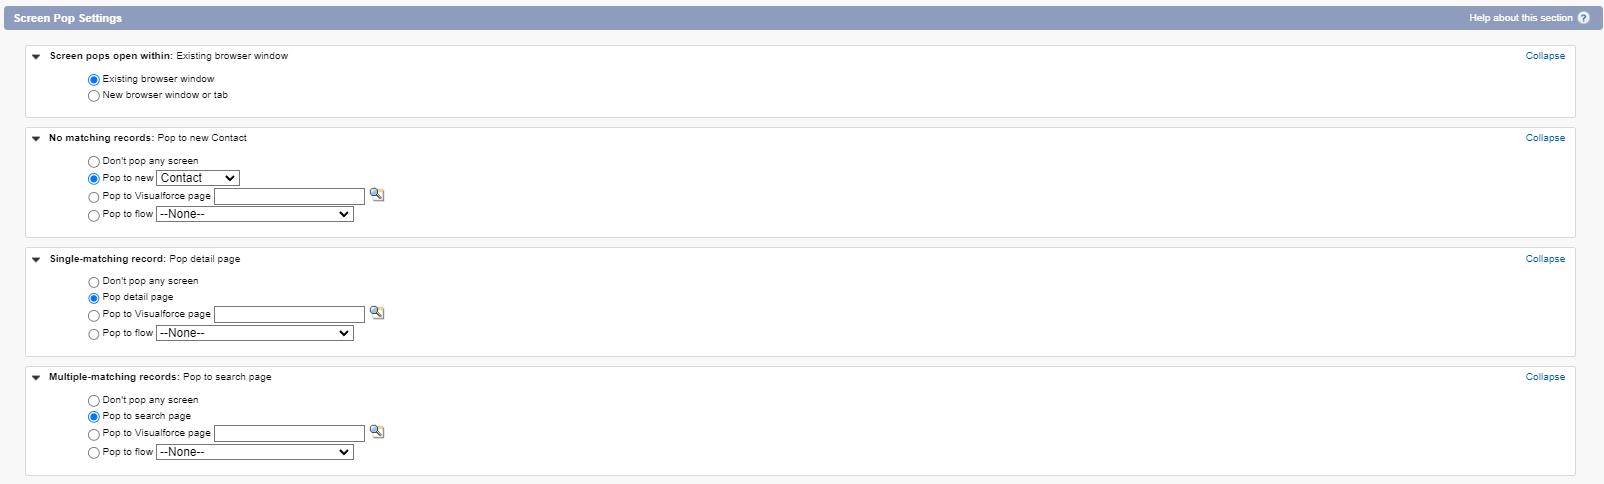
Scroll down to the ‘Screen Pop Settings’ and change these accordingly:
-
Screen pops open within: existing window
-
No matching records: Pop to new Contact
-
Single-matching record: Pop detail page
-
Multiple-matching records: Pop to search page
-
-
Click the Save button
Testing the AnywhereNow WebAgent
-
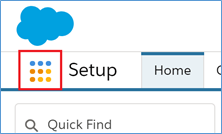
In SalesForce Setup click on the 9 dots next to Setup, the App Launcher will open.
-
The AnywhereNow WebAgent app should be visible under ‘All Apps’. If not, search for it with the search field on top.
-
Click on the app tile to start up the application.
-
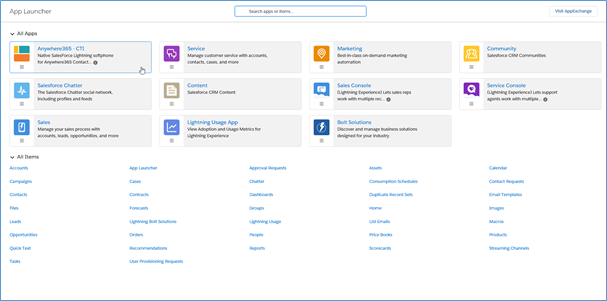
At the bottom you’ll see the utility bar with a button to open the AnywhereNow WebAgent.
-
Click the button ‘A365 - WebAgent’
-
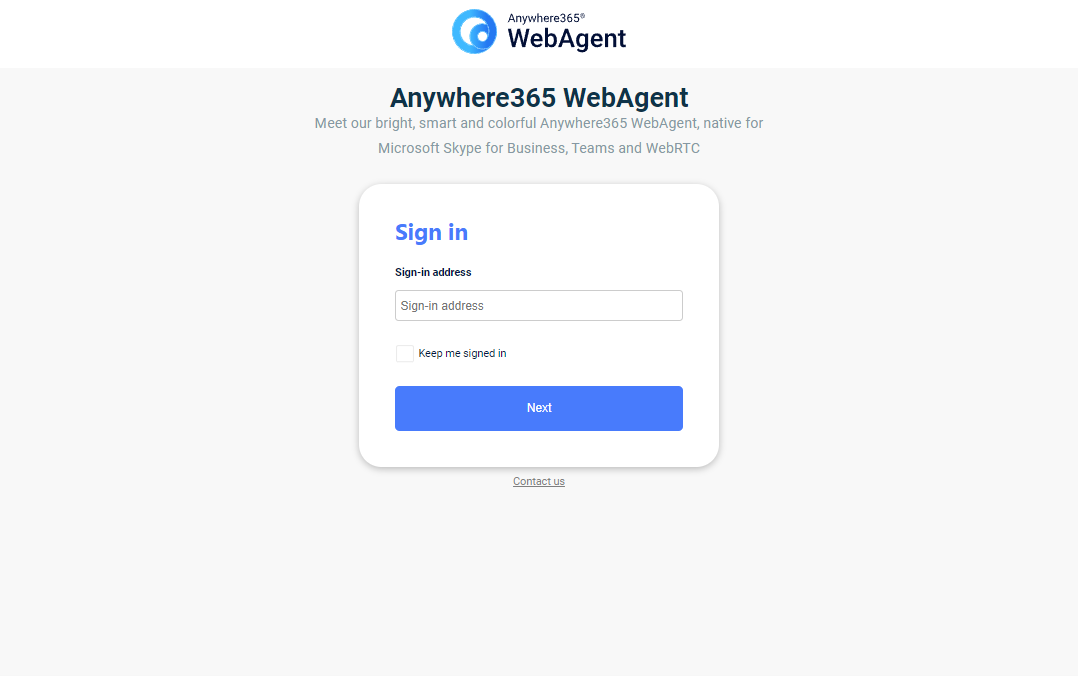
Log in with your AnywhereNow enabled account.
-
After logging in, you will be ready to start using the native SalesForce Lightning softphone for AnywhereNow Contact Center and Dialogue Management Platform